Thursday, April 30, 2009

Tulista Textiles Show

Last night I attended the opening of a fibre arts show put on by the group 'The Colour Connection', in Sidney, and was very pleased that I went. Four group members have over 40 works hung - alot of hand-dyed fabrics, free form piecing and some really exquisite pieces. I met a few other members of FAN while I was there - and that was particularly relevant because I am leaving on a trip tomorrow with the first stop being Madeira Park to see Fan's 'Elements' show. The deadline to participate in this show had passed before I joined the group - otherwise I might have had something of my own in it! I won't be posting for a week or so, but I'm taking emboiderey supplies, a sketchbook, my camera and coloured pens along to continue my creative endeavours. I have heard there's a great fibre shop in Nelson, which will be the farthest destination I go to - and I'm sure I'll find all kinds of goodies along the way!

Wednesday, April 29, 2009

Give 'Piece' A Chance


Here's another type of piecing I tried today - and I realized that I could place this new block above the one I did yesterday for a vase with abstract flowers effect - the flowers being in the central square of the new block. I've played with many possible backgrounds and connecting the vase to the flowers with ribbons or a striped fabric piece - also trying out an orange poppy button in the flower square to draw the eye - but I haven't hit upon the 'right' combination yet , so I'll let it sit for awhile. Maybe I won't even combine them at all! On another note, I am thrilled that some others entered the dialogue about whether our limitations determine our style, and I have a few further thoughts. With complicated piecing, for example, that is only a limitation if I keep it one - I can learn it, even though it would require alot of discipline, will take time and may not be easy. So what I consider to be a limitation can change and my style might alter as I master new skills, which does seem to link my style to my percieved or actual limitations. On the other hand, I do think we are born with something unique to each one of us and that that aspect of ourselves will come through in all we do. It's a complicated question because we continue to grow throughout our lives and I would think that my style will also evolve, even as it maintains something of the original seed - like how a tree adds new branches each year but you can see that it's still the same tree. I've been making art quilts for two years now and since I don't have a history of previous quilting or sewing experience other then a home-ec class long ago, perhaps I am still developing my style - trying new things and coming to understand what works for me and what doesn't. At some point, I imagine I will hone in on something and expand my skill in one area - or maybe I will just call my style 'eclectic' :) .

Tuesday, April 28, 2009

Style and Limitations

I've been wanting to practice further with piecing, so today I cut a few curves and when I pieced them by carefully matching registration marks and pinning every half inch then keeping to about an eighth of an inch seam, I still had several spots that were pinched. I got out my seam ripper and then resewed these portions but I found myself wondering if I will ever be able to do this. Any curved piecing I've done in the past has been more gentle and I didn't encounter problems even though I didn't do any pinning at all. So then I consulted one of Ruth McDowell's books on piecing and it looks so deceptively easy. I just sat and enjoyed the photos of her quilts and her incredible skill with putting fabrics together, though, because I've tried one of her pieced squares with detailed instructions - and I still couldn't put it together properly. Which brings me to a question. The other day I heard a quote on the radio saying that our style is a reflection of our limitations. The quote was directed at musical composition, however, I wondered if it might also apply to fibre art. My current limitation is this piecing business - and it's a challenge I want to meet and overcome. The quilts I've made to date are largely collaged and appliqued, although I do have several that are pieced. The pieced ones were made as I developed them, not with a pre-existing plan. So one aspect of my style that could be a result of limitations is to not preplan. If I was an excellent piecer like Ruth McDowell - would my style change to one where I pre-planned quilts? If I keep attempting to learn piecing and master it - would I still naturally gravitate to working without a plan? Maybe certain people are just more likely to be drawn to one way or the other, based on what comes most easily. I imagine that those who are impatient to get their ideas concretized - like me - choose methods that are the quickest.

Sunday, April 26, 2009

Fantasy Garden

More embroidery, beads - including a stacking stitch for a 3D effect - and it's done!

Saturday, April 25, 2009

Texturizing

Earlier today I tried some new beading stitches - making a bead 'flower' by using bugle beads radiating out like the spokes on a wheel, with seed beads on either end. For the center, I used 3 seed beads with each stitch, pulling them tightly so they created one piled on top of the other two. I had planned to use a cabochon or very large glass bead for a focal point, but decided that I preferred a scrap flower cut from already beaded and sequined lace. I was blown away by how long it took to do a very small amount of beading in terms of surface coverage and I wanted my piece to have alot more texture from stitch, so I embroidered with various colours in a variety of ways. I feel so desirous of creating fantastic dense and interesting stitch - yet the reality is that I'm a beginner and I'm experimenting rather blindly. It's starting to look like something now and I'm comforting myself by noticing the build up of texture and interest in small areas, with a plan to check each square inch to see if I'm satisfied with it as I keep working on it. I am trusting that I will like the result well enough, even if I cannot yet achieve my visions. We all start somewhere...

Friday, April 24, 2009

Photo Play


I love taking photos - and making collages with them. Sometimes I'm imagining how they might translate to stitch or become a quilt block. The one of me on the bridge is a composite with a close-up of a wasp nest and I think the curves look like brush strokes in a painting.

Thursday, April 23, 2009

Artist Date to Satin Moon Quilt Shop


I thought I might get to experimenting with piecing today, but a book I have on beading called my name and suddenly I was imagining doing a densely stitched, textural beaded piece in a frame. I have a gold frame sitting empty and a good spot on a wall to hang it, so I cut timtex to size and a base of yellow velvet, then added stitching, chiffon, angelina, yarns and thread. It doesn't look like much yet but I will add to it and hope it grows into a lovely bloom like these magnolias. The mandala of fabrics are ones I found at Satin Moon today - what a great store. I had planned to go to a bead shop but ran out of time since there was so much to look at!


Wednesday, April 22, 2009

Bead There Done That

This quiltlet is complete now - I've added free motion stitching and beads, and satin stitched the edges.

Tuesday, April 21, 2009

Moon Rabbits

Yesterday my creative juices were just not in flow - and it felt odd because usually I have so many ideas pushing to be born. I reasoned that I have been creating pretty steadily and perhaps I just needed some time for seeds to lie dormant. I know that if I start playing with materials something often takes hold and a next process begins, but when I tried that, it didn't happen. I had cut a few potential scraps to applique onto my recently dyed sweatshirt, but that combination just wasn't coming together, either, so I left to go read one of the books that I have on the go, thinking that a change of pace might do the trick. The next few pages of 'The Gift: Creativity and the Artist in the Modern World' by Lewis Hyde, told a Buddhist story of how the image of a rabbit ends up on the moon. This is a motif I have in fabric, that along with other rabbit fabrics were sitting out on my cutting board, and since there is some personal significance in the symbolization and timing of the hare in the moon motif for me, I was energized to go begin a quilt. I decided to keep it very small and to collage a few of the cut scraps, along with some of the rabbits onto batting. I love the challenge of designing - including with the handstitching. Each raw edge has its own best colour of embroidery thread and a decision as to style and size of stitch. While at the recent 'Lilies' fibre show, I was reminded that I'm most drawn to interesting combinations of fabrics depicting more imaginative then realistic representations. The three moon rabbits look like peas in a pod, and I'm imagining that's how they grow - as the pod plant grows taller and taller, it reaches the sky and the first moon rabbit is launched into space until the next 'new moon' rabbit bumps and replaces it. And so on. Now that could be a children's story!

Saturday, April 18, 2009

Consider the Lilies Show
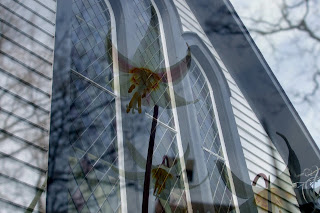

I went to see the 'Fibres and Beyond' group show today in this lovely old church set on grounds with Garry Oak trees and awash in lilies. This is the third year I've been out to see the show and each time is quite different, with varying guest artists, as well. I appreciate the opportunity to see how others are working and to notice what I most resonate with and why.

Friday, April 17, 2009

All Done


I finished the final bit of free motion quilting in the center of my watermelon quilt today and I wish I could iron it, but my iron is kaput! So I will be shopping for a new one very soon, as this is a tool I can't be without. I showed my quilt to the art quilt group I belong to last night and learned that I might have made it much more easily without virtually any handstitching by using a pillow case inside out method and cutting a gap in the center of the batting to turn the whole quilt inside out and then stitching that bit up. Also, they suggested that the corners wouldn't need to be sewn in separately, but could be added to one side and attached as a whole side. Good ideas if I ever do a scalloped edge again. We also saw samples of fabric 'bark' and heard about how to simulate it using a wide range of materials.

Thursday, April 16, 2009

Inspired to Paint


Last night I attended award winning quilter Gail Thomas' trunk show at Satin Moon Quilt Shop. You can see her work here: http://www.gailthomasart.com/quilts.php Gail warmly agreed to having her picture taken with me so that I could post it as a marker on my fabric journey. I enjoyed her open enthusiasm in sharing with us and her love for what she's creating. I especially resonated with how she sometimes paints and quilts from her dreams, receiving 'answers' to technical challenges that way, as well. I do alot of dreaming about fabrics and techniques and I'm glad the process keeps on working even when I'm in bed. One of Gail's pieces was done in watercolour pencil and covered with clear gesso when it was dry, for protection. Mostly, though, she uses 'Angel' paints from Vancouver's Gastown on her quilts because they keep the fabric's hand soft and allow for working in layers when thinned, and I decided to buy some since there happened to be a set available. I have been wanting to paint on fabric for a long time - and I decided to put these paints to use right away. I wet one side of my fabric and left the other dry to experiment with how the paint reacts. The tulips are on the dry side and it was just a quick rendering from my imagination. While the outlines stay sharper, I prefer the flow of working wet on wet. I did like the dry brush effect of the upper right corner. The blue/orange floral close-up was on the wet fabric. I'm considering whether to paint the sweatshirt I dyed yesterday - or maybe combine paint and fabrics, as Gail does in her pieces. I particularly like how she uses patterned and coloured fabric along with paint. Her stitching was beautiful - she uses a 14 quilting needle and quilter's cotton thread and wool batting and loves her Sapphire Husquavarna.

Wednesday, April 15, 2009

Over Dyeing a Sweatshirt


I found this cotton sweatshirt for 4 dollars in a thrift shop and I bought it because I thought it was the perfect candidate for a makeover. I decided to dye it first to try to get a green and brown from the original orangey rust, which did not look very attractive. I immersed it in a turquoise dye bath and did end up with green and brown with some leftover rust. Now comes the fun of auditioning fabrics and creating a design! I also finished pinning the scalloped edges of my watermelon quilt and I handsewed one side and quilted that border in the ditch.


Tuesday, April 14, 2009

Scalloped Edge


I've finished sewing the pieces together and as I predicted, the corners were not an exact fit by any means. It almost seemed that I ended up putting them together intuitively - or maybe I should say 'randomly' and 'fortunately'. I know I was surprised when they worked out - my method after stitching each side of the corner on and discovering gaps and misalignments was to sew it from the backside, aiming for the seam of the border, which actually worked out not too badly. This morning I sandwiched the top, and quilted it in the ditch, but only partially. The close-up photos show how I've basted (who me? This is a first - I'm more 'attached' to glue:)) the top's edge, then cut away the batting flush with the top edge and then cut the edge of the backing fabric.


Monday, April 13, 2009

Breaking a Pattern of No Patterns


Since beginning to sew, two and a half years ago, I haven't used patterns, so I don't have a history of making traditional quilts or having taken workshops to master sewing skills. While I have learned along the way through the doing, I am challenging myself to hone the skills for finer finishing - I want to improve my technique. Also, I am curious to see what I will learn by following a pattern, and that's how this project began. The pattern is from a book and I've copied measurements and templates. Unfortunately, the book does not include detailed instructions for how to sew the center piece together and unexpected challenges have already arisen for me. When choosing the fabrics from my stash, I wanted to have co-ordinating colours, variety and to adhere to a watermelon theme. The checked fabric reminds me of a picnic tablecloth, and if you click on the top photo to enlarge it, you'll see that those circles on the black fabric are watermelon rounds and that the red/pink swirling fabric is made up of tiny checks that mirror the checked fabric as well as have a 'seedy' feel since they are many little bits. Also, the circular swirls are a reference to the watermelon rounds, spots on the green inner border and roughly of the roundness of a watermelon itself. Locating the right combination of fabrics from what I already have involved alot of auditioning - and then, when I cut the pieces, I discovered I had to make changes since I did not have quite enough of two of the chosen fabrics. I had planned to make a mitred inner border, but since the instructions called for a longer strip of fabric then what I had, I went with the above look. Also, the black fabric from which I cut scalloped shaped pieces, couldn't accomodate two pieces that I needed. Since each side has 3 scalloped pieces, I decided to make the center one a different fabric - which required more auditioning and not finding anything quite right or large enough. So I've decided to use a different center scallop piece for each side. I'm noticing surprises for me about what works with what - I thought the red swirly piece would be my favourite for the center scallop, but when I overlaid it after it was sewn in with another of my choices that was green, I noticed that the contrast of the green beside the pink checks looks much better. I was more focused on matching the center scallop to the inner watermelon square - and while that's a part of the whole, I can see that getting the order right with these individual pieces is a challenge. When I normally create as I go, I think this is less of a problem because I'm only matching what's already there, not trying to match something that is several steps down the road. After I sewed the four green border strips to the central square, I noticed that in spite of my careful measuring and use of a quarter inch foot, some of the border were not square and/or extended past the edge of the border piece they squared up with. What to do - because if the border edges aren't even, then surely that would create problems when I would sew the scalloped border on. So I retrimmed everything so it's a large square again, only I know that from the center watermelon square to the edge of each border is not the same dimension. Surely this is not how it's supposed to be? Next I followed an instruction from the book to mark a quarter inch from the edge of the green border and from the sewed scallop and check strip. Only the edge of the scalloped and checked pieces was longer then the green border - not to mention very uneven again. So, I did some more trimming. I'm not sure how this will work out when I sew the corner pieces on. The above photo shows that the quarter inch mark for the checked fabric is right where the green border piece begins and the quarter inch mark for the green piece is another quarter inch in from that. Hmmm. Isn't using a pattern supposed to eliminate these sorts of problems?

Thursday, April 9, 2009

Bunnies and Flowers Time of Year


As soon as I saw little fleece bunnies yesterday in a book on using fleece, I wanted to make one. I had a scrap of fleece, so I modelled this Easter bunny from one in the book, making a few changes and adding embellishments to give it its own personality. I've never worked with fleece before and I partially sizzled some of it to my iron and had an eggstra :) cleaning job to do. The petal shape of the eyes was another unplanned event, when my thread accidentally looped since I had the opposite side of the fabric facing me. I decided I could use the loops to my advantage - I really am coming to believe that there are no mistakes but rather that the project is going where it wants to go and to trust the process. The petal eyes mirror the shape of the petals on the fabric, the shape of the ears and even the carrot is similar.

Tuesday, April 7, 2009

T-shirt Makeover


I've never altered a t-shirt before - I had one that was too long, so I started by cutting and rehemming and when that worked out well, I moved on to shortening the sleeves at an angle to improve the shape and then I added these playful fabrics to the front, using free motion stitch. I feel delighted to customize my clothing, as I so rarely find items that I really like.